3 chairs

3 chairs
Showing posts with label custom chest of drawers. Show all posts

Friday, March 9, 2012

Finally: A chest of drawers!

Sorry I haven't posted in a few days but as you'll see I have made lots of progress.
Here is the picture I promised you in the last post. The case glued together with all the drawer runners.

I stained the drawer fronts before gluing leaving the inside parts of there drawer natural. I think it gives the piece a better look.

The deeper drawers require more clamps since the 1/2" poplar tends to cup a little.

Test fitting the completed drawers. Some of them require a little hand planing for smooth operation. I always wax the runners and bottom part of the drawers also.
I like this view.
I decided to put breadboard ends on the top. Not only does it look nice but it also helps keep the top nice and straight.

First you create the mortice and then the haunched tenon. The tenon is a little shorter than the mortice to allow for expansion across the width of the perpendicular top. The mortice is also a little deeper than the tenon is long.

This shows where I've marked for the square pegs on the breadboard. The pegs are functional since you use very little glue. Again for expansion and contraction.
First I drill a 1/4" hole and then square that hole with a chisel. Just the first 3/8" or so. I used a 5/16" peg,  rounded the end, then drove it in with a mallet.

After the glue dries I cut the pegs off then sanded them down. Makes a nice detail.
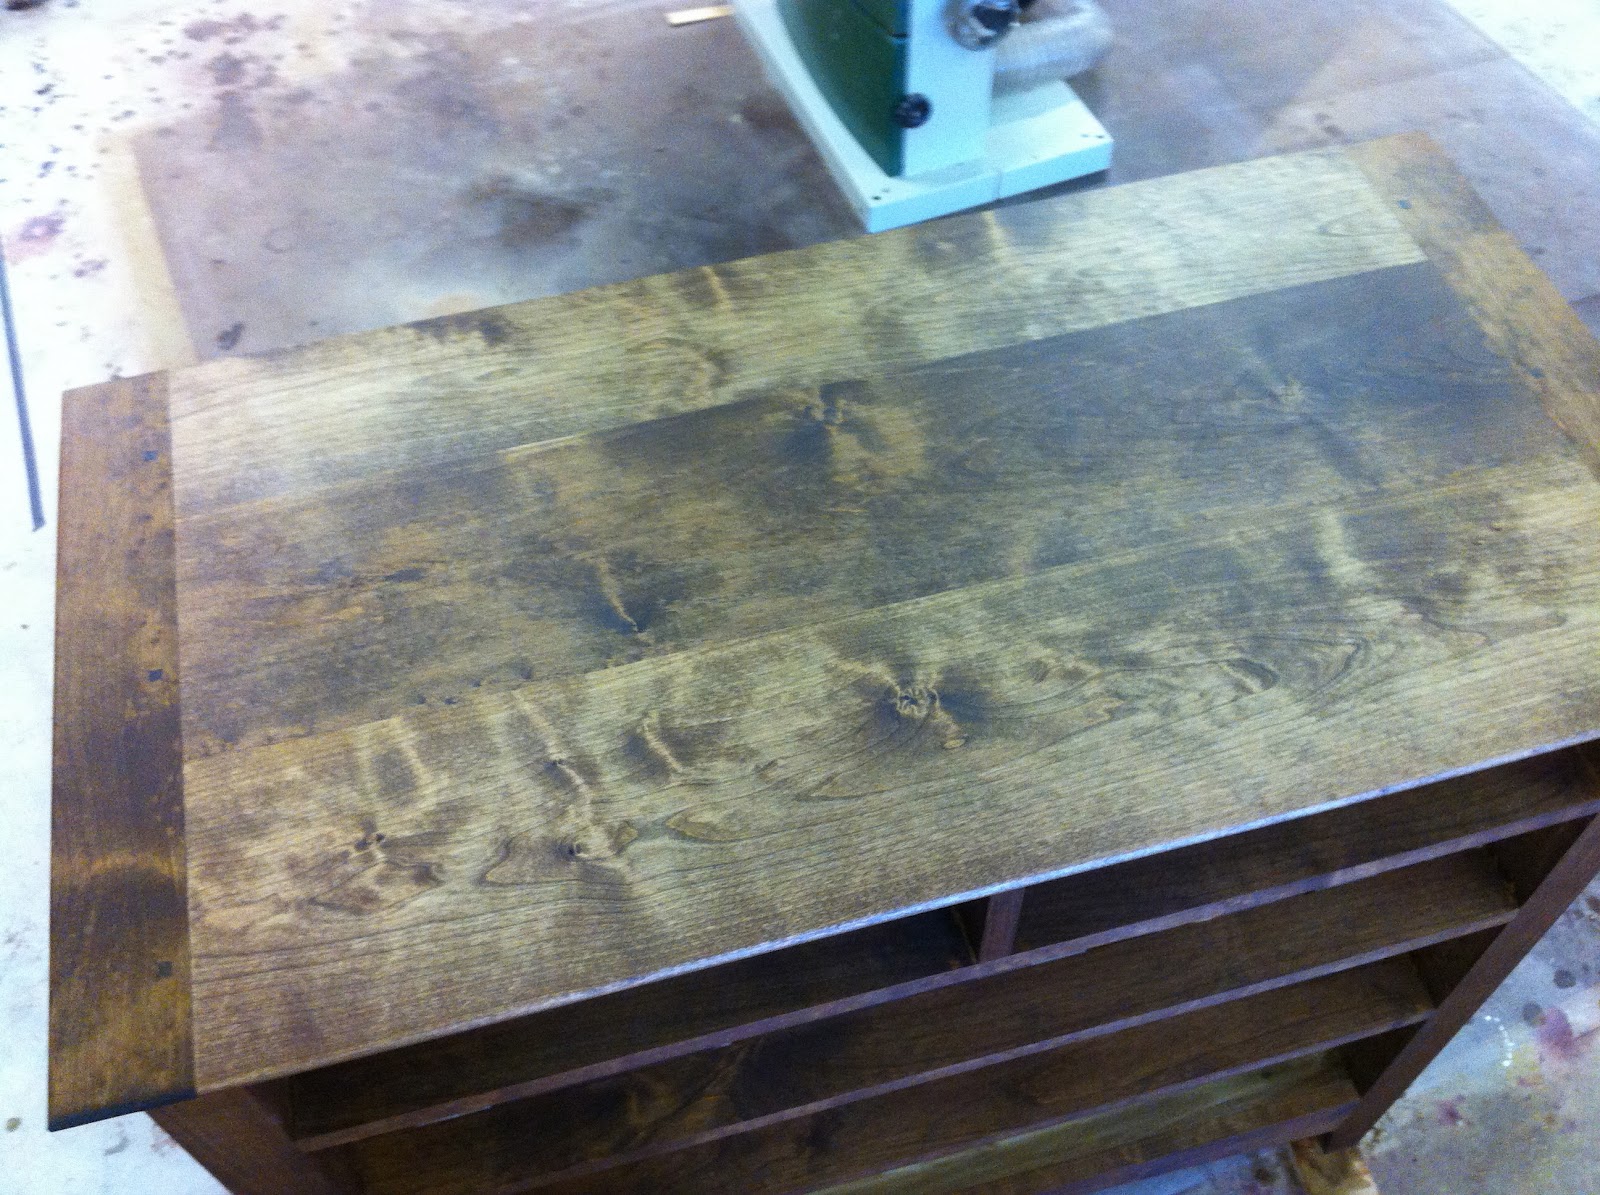
Here is the top stained and attached. I used 4 screws, one at each corner, again to allow for movement. The holes on the stretcher underneath were elongated. I also did a little edge treatment on the top with my shaper.

I used Watco dark walnut for the stain.

All done! I sprayed it with several coats of Sherwin-Williams Cab-Acrylic dull-rubbed laquer which has a satin sheen. I used their vinyl sealer as a sanding sealer. I ordered some new tips for my HVLP and the 1.0 worked great. Finishes have always been the toughest part for me but I think I have finally hit on the best combination of material and equipment. At least for me!
All that's left is the pulls which I ordered Wednesday. When those come in I'll post a picture of the chest in the house. Next up is Peggy's garden building which I'll start next week. Than Peggy's chest of drawers which is the same 'cept different. Stay tuned!

Wednesday, February 29, 2012

I'm back!

I've been busy the last few days working on the chest and it's time to post some progress. Once again I'll start with the weather report: It's great! Warm and sunny with just enough rain.
Here's all the pieces for the chest. All milled and morticed and tenoned.
Had to take 2 pictures to get it all in. Alder is the primary wood and poplar is the secondary.
Peggy helped me glue it together Sunday and it was definitely a 2 person job. This isn't the picture of the glue-up! I guess I forgot to take one. I'll post one of the carcass tomorrow. Sheesh!

Here it is with the drawer fronts all fit to the case. I spent today cutting and milling the drawer sides and backs and got all the dovetails cut. At the end of the day I started cutting and milling the material for the drawer bottoms. Should get that done tomorrow. I have to stain the drawer fronts before glueing the drawers together. Getting close!
And here is the first bluebonnet of the year! This is the plant that I posted the other day. Should be a really good year.


Thursday, February 23, 2012

Update

It's been a little while since I've posted so I thought I would update some things for you. The weather here has been absolutely great the last few days. The bluebonnets are starting to put some buds on and one of the peach trees has blooms on it. Spring is definitely right around the corner.
I finished the two bath cabinets. They turned out pretty good.


Like small file cabinets

I put several coats of amber shellac....

...followed by a glaze to darken and age it some.They also have some small castors as per the customers request. These will be delivered on Saturday. 

Also finished the 3 medicine cabinets and installed them. The stain is a custom color and then shot with a dull-rubbed lacquer. 

I drilled lots of holes so they could put the shelves exactly right.

This is a linen cabinet we re-did last year with knotty alder doors.

Downstairs bath

Last year we enclosed a carport at this same customers house making a huge master closet. They had a closet as part of the bathroom with 4' bi-fold doors. I suggested we remove the doors and make it a cased opening and add some shelves for storage. When it was done the customer asked if I could add drawers and doors. So here is a particle board and knotty alder storage unit. There is another bank of drawers to the right of this unit. She loves it!

And here's the next item. Actually 2 items. This is kind of a mission style chest of drawers. The second chest will be the same size and configuration with couple of design and finish changes. I'm building this one first. It is alder with poplar as the secondary wood. All mortise and tenon case with dovetailed drawers.

One of the many mortises laid out.

The legs have slight tapers on the inside below the skirt.

Working on one end.

I cut this dovetail on the top stretcher to really tie the case together.

Checking the fit of the center stile on the end

This is a dry fit to check panel dimensions and interior stretcher lengths. Lots of parts! Hopefully I'll get something glued together tomorrow.