
Sorry I haven't posted in a few days but as you'll see I have made lots of progress.

Here is the picture I promised you in the last post. The case glued together with all the drawer runners.

I stained the drawer fronts before gluing leaving the inside parts of there drawer natural. I think it gives the piece a better look.

The deeper drawers require more clamps since the 1/2" poplar tends to cup a little.

Test fitting the completed drawers. Some of them require a little hand planing for smooth operation. I always wax the runners and bottom part of the drawers also.

I like this view.

I decided to put breadboard ends on the top. Not only does it look nice but it also helps keep the top nice and straight.

First you create the mortice and then the haunched tenon. The tenon is a little shorter than the mortice to allow for expansion across the width of the perpendicular top. The mortice is also a little deeper than the tenon is long.

This shows where I've marked for the square pegs on the breadboard. The pegs are functional since you use very little glue. Again for expansion and contraction.

First I drill a 1/4" hole and then square that hole with a chisel. Just the first 3/8" or so. I used a 5/16" peg, rounded the end, then drove it in with a mallet.

After the glue dries I cut the pegs off then sanded them down. Makes a nice detail.
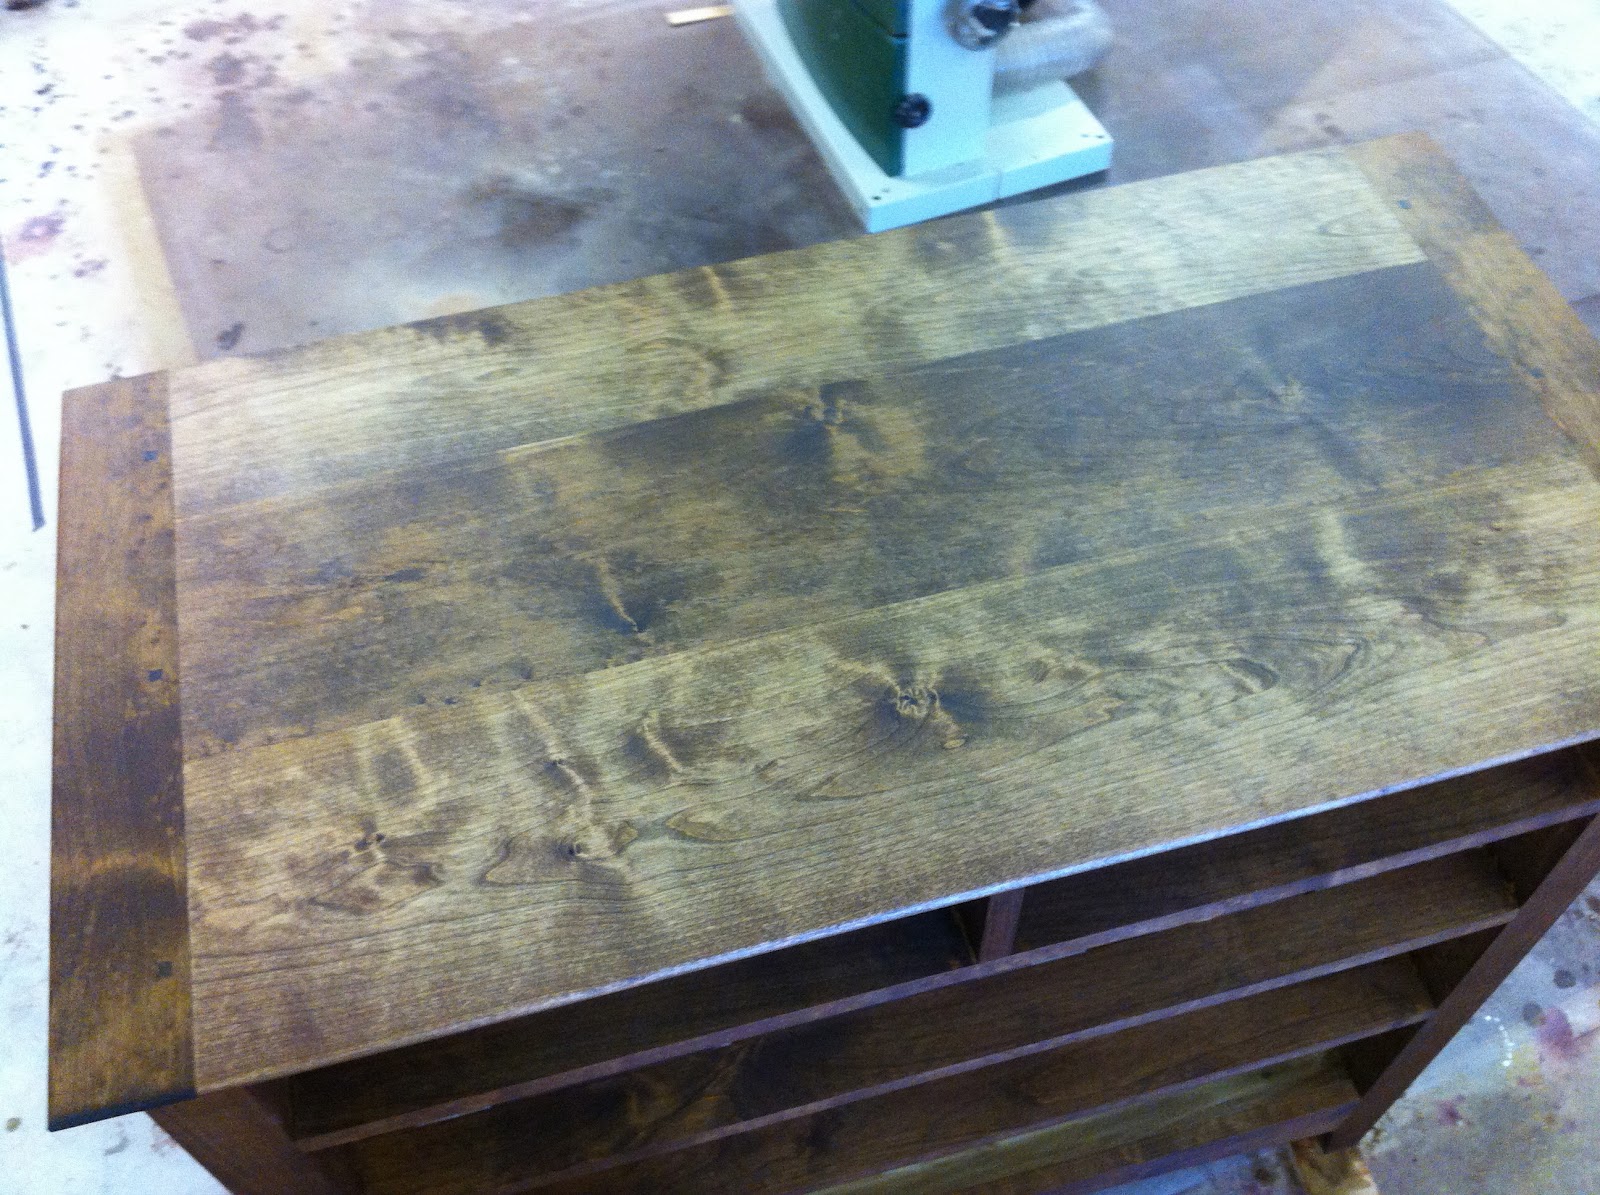
Here is the top stained and attached. I used 4 screws, one at each corner, again to allow for movement. The holes on the stretcher underneath were elongated. I also did a little edge treatment on the top with my shaper.

I used Watco dark walnut for the stain.

All done! I sprayed it with several coats of Sherwin-Williams Cab-Acrylic dull-rubbed laquer which has a satin sheen. I used their vinyl sealer as a sanding sealer. I ordered some new tips for my HVLP and the 1.0 worked great. Finishes have always been the toughest part for me but I think I have finally hit on the best combination of material and equipment. At least for me!

All that's left is the pulls which I ordered Wednesday. When those come in I'll post a picture of the chest in the house. Next up is Peggy's garden building which I'll start next week. Than Peggy's chest of drawers which is the same 'cept different. Stay tuned!